Predator 2 Walkthrought
Hot on the trail. In Predator II on the Sega Mega Drive/Genesis — yep, the movie tie-in — the key is staying locked in: the compass arrow drags you to the next poor soul, three red laser dots start dancing across the screen, and goons spill out of every alleyway. Below is pure, practical routing by rooms and districts — how to clear fast and clean, leaving no outs for the dealers or the Predator itself.
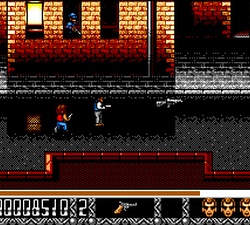
Streets and early blocks
The opening zone is a maze of tight alleys, double-parked cars, and doorway spawns. First move: follow the arrow down-right — the first hostage often huddles against a wall behind a parked car along the southern edge, right in a crossfire. Approach at an angle and use diagonal shots so you don’t clip them. A medkit sits behind the blue van on the next screen — grab it after the rescue, not before. Drug stashes litter corners and hide behind dumpsters — scoop them as you go, but the moment you hear that shrill ping and see three red dots lock onto the next hostage, drop the loot and sprint straight by the arrow. Hesitate and it’s a casualty — and a “trophy” for the Predator.
The graffiti house along the north edge is a classic trap. Looks clear outside, but inside the left room there’s a hostage tied behind a table. Enter through the right door, immediately hug the bottom wall, and snap a short diagonal burst into the top-left corner — you’ll drop two shotgun thugs without touching the captive. On the way out, check the dark stairwell — there’s often a shotgun there; stash it for the stage boss. At the newsstand intersection, don’t wander into the upper dead-end: a corner-wave spawns, drags you off the compass, and meanwhile the Predator is already painting another victim with the laser.
Subway station
The subway entry is a narrow columned corridor. Don’t charge up the middle; stick to the right wall — knife punks love to spill out of the service doors. First hostage stands between vending machines on the platform — approach bottom-to-top, feathering diagonal shots so you don’t punch through their back. The arrow then points to the next hall with two cars. Clear the left car first, but don’t push too deep: two enemies lurk in the upper doors and love to pop out with the hostage at their backs. Once they’re down, check the window shelf — there’s often an assault rifle; hang on to it.
The tunnel choke is tight with a blind corner — set a funnel: do a tiny step back-forward to line enemies up and keep them from wrapping around. The medkit is by the trash can at the far end, but only take it after you wipe the staircase squad — otherwise you’ll eat buckshot in the spine. Here the Predator loves to “spook”: three red dots jitter across the screen and he shimmers between columns. Don’t bite — your priority is the hostage by the stairs. Grab them, then retreat immediately, because a fresh wave spawns on the descent. The mini-boss in the station plays out between pillars: keep a column between you and the plasma, peek and fire when he opens up right after a blast. Best spot is the lower-left quadrant — easy diagonals, minimal exposure.
Warehouse districts
Docks and depots mean chokepoints and corner rooms. The first hostage usually sits by a stack of crates in the bottom-right room: enter from the upper doorway, delete the two on the left instantly, and only drift down once the far corner is safe. Remember: the compass arrow sometimes “lies” by a screen because of partitions. If it points straight through a wall, look for a side route via the room with the forklift — along the left wall there’s often a grenade launcher. Save it for your next Predator encounter.
The conveyor room is nasty: a drug packet rides the belt, but walking out under a crossfire is a bad play. First, lure enemies into the left doorway and stand half a tile lower — it “cuts” their bullet paths. The medkit is behind the right shelving, but grabbing it pulls another wave. Take it on your way back, when the arrow calls you forward. The area’s last hostage is kept in a two-door room. Enter from the lower door — the sightline’s safer and the chance of a stray shot is lower.
Meatpacking plant
Cold rooms and steam — visibility drops, enemies jump right into your face. The first screen has hanging hooks. Don’t hug the right wall: two shotgun brutes spawn there, and their opening blast is practically point-blank. Immediately slide diagonally to the bottom-left and hose the top-right from cover. First hostage is by the control panel; medkit to the right — only take it after you clear the lower corridor or you’ll eat a crossfire.
In the freezer gallery the Predator turns cat-and-mouse. If you see three dots land on a hostage, don’t cut straight through the central hall: there are dead tiles and blind zones. Wrap through the left freezer instead — you’ll pop out slightly below the target and won’t risk a head-on friendly fire. The mini-boss here melts to a shotgun: two to three bursts timed for the moment he decloaks after a plasma shot and he bails. Use the pillars for cover, and don’t stand in the doorway: plasma travels dead straight and can tag two screens in a line.
Penthouse
Gold columns, glass dividers, way too much reflected glare — a tricky map. First hostage sits by the bar, and the two behind it love to toss grenades. Come in from the balcony side: stand half a tile below the countertop so grenades sail over while your shots arc in clean. The central elevator is a great shortcut. If the arrow points to the fireplace room, ride up, step out, swing left immediately — don’t crosshatch the glass maze or you’ll ping a hostage with a stray burst.
On the terrace, the wind funnels enemies into slim lanes — abuse it: post up by the HVAC boxes and hold a diagonal on the stairs. The medkit’s behind the statue near the pool, but grabbing it early is risky — it wakes a group on the right. This is also the best spot to greet the Predator: the two boxes form a corner that blocks his plasma. Slip out right after his shot and dump an AR burst into his window. Keep the grenade launcher — you’ll want it in the next arena.
Rooftop and Predator’s ship
The rooftop is all bustle: skinny catwalks around vents and big open patches where you can lose tempo. Sometimes the compass points “through” ventilation — don’t try to hop it; go around the lower perimeter. There’s a final AR ammo pack there and a couple of drug bags for bonus points. The helipad hostage — approach from the bottom; enemies along the top edge love to backshoot. Saving them opens the path to the last zone: organic walls, dim light — yep, the Predator’s ship and the endgame arena.
The final boss in Predator II flips the tempo. The arena is symmetrical, and the columns are your best friends. Core loop: bait the Predator to reveal and punish. As soon as he fires a plasma bolt, step out, tap a short burst from the shotgun or AR, step back. If you kept the grenade launcher, don’t hoard it — fire when he materializes half a screen away. Don’t stand along a long corridor axis — if he throws the smart disc, it travels dead straight and chunks too much health. Cut corners, count the rhythm: shot — beat — shot — reposition. Three to four clean cycles and the arena falls quiet.
To wrap up Predator II: in every district, hostages are priority one. Read the arrow, listen for the targeting beep, take rooms on a diagonal, grab medkits on the way back, and save special weapons for Predator skirmishes. Pick up drug stashes when you can — free score and an extra life never hurt. Do that, and Los Angeles survives another night — and you clear the game smooth, stylish, and stress-free.